- Published on
Simplifying Multi-Branch Workflows with Git Worktree
- Authors

- Name
- Kiet
Problem
Tired of constantly stashing and unstashing every time you switch between hotfix and feature branches?
I often encounter this situation when I need to fix a production bug while working on a new feature. Before discovering Git worktree, I either had to stash my work or make a temporary commit with something like "TODO: squash later.".
Both approaches are time-consuming. And sometimes, I even forgot to squash the commits.
But now, Git worktree saves the day.
Definition
Manage multiple working trees attached to the same repository.
A git repository can support multiple working trees, allowing you to check out more than one branch at a time. With git worktree add a new working tree is associated with the repository, along with additional metadata that differentiates that working tree from others in the same repository. The working tree, along with this metadata, is called a "worktree".
The definition is clear: Git worktree allows you to create multiple working copies of a repository on different branches, enabling you to work on multiple branches simultaneously and switch between them easily.
Practice
I’ve been using two different approaches when working with Git worktrees. Below, I’ll explain both methods and discuss the pros and cons of each.
Using Non-Bare Repository
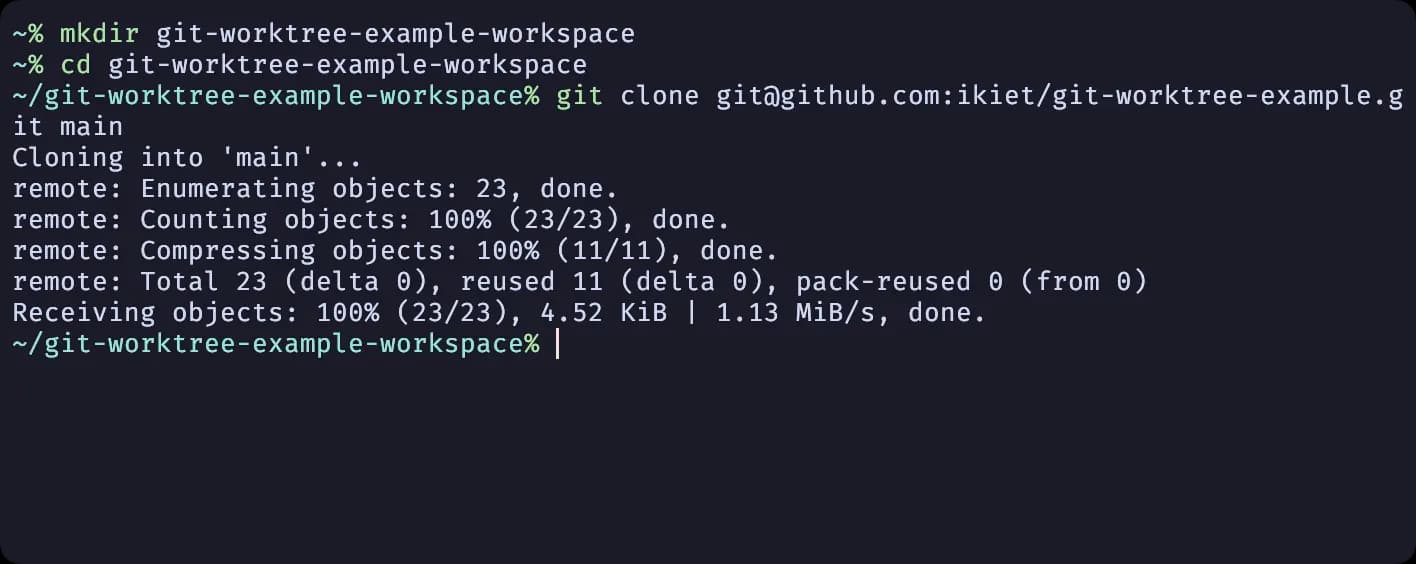
With this approach, when you clone a project, Git automatically creates the main worktree in a folder. If you want to keep your worktrees organized at the same folder level, I recommend creating a workspace folder before cloning the project. This way, all your worktrees will be neatly organized within the workspace folder. Here’s how you can set it up:
mkdir git-worktree-example-workspace
cd git-worktree-example-workspace
git clone <repository-url> main
You can list the worktrees with the following command:
git worktree list
As shown, Git automatically creates the main worktree for you.
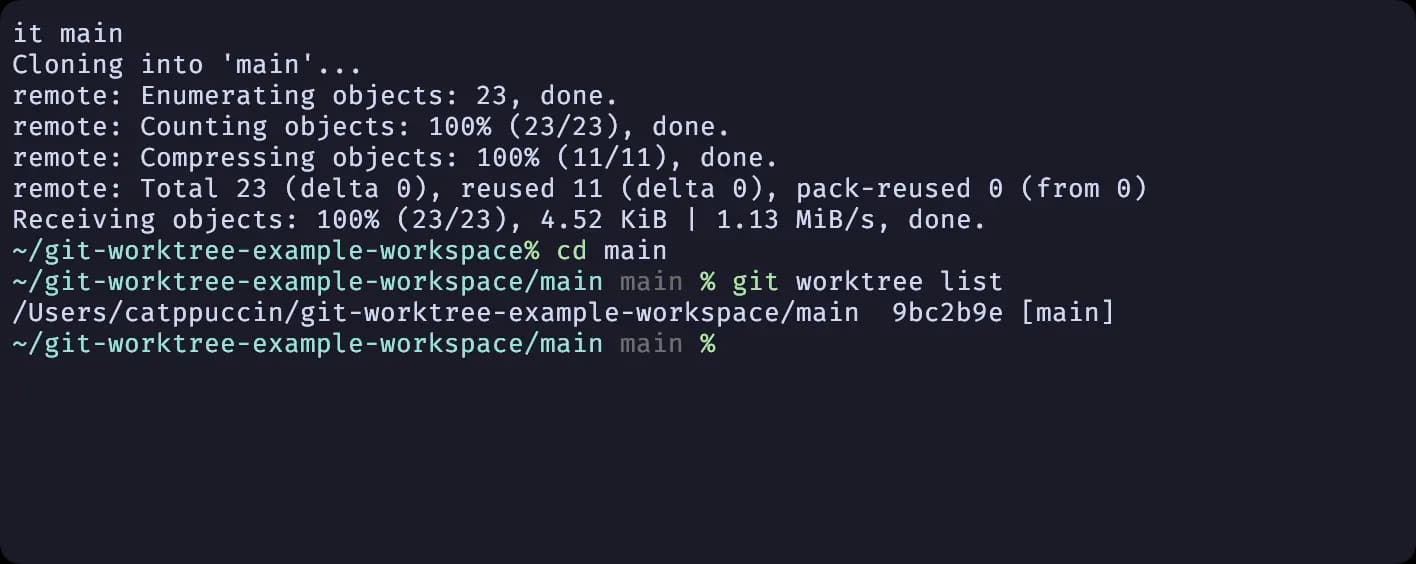
To create new worktree, you need to cd into the main worktree, where the .git folder resides:
cd main
git worktree create ../feature
Now, you have a workspace with two worktrees, and the folder structure will look like this:
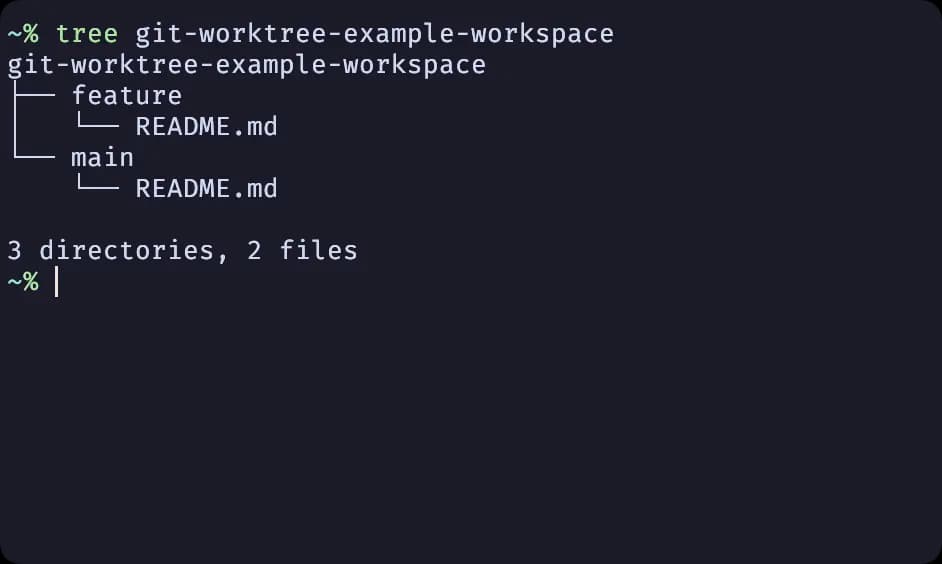
With this approach, you get a clean worktree folder structure without needing any hacks (unlike the second approach). This is the method I currently use. Although you’ll need to remember to move up a folder when adding a new worktree, this minor inconvenience hasn’t caused any issues for me.
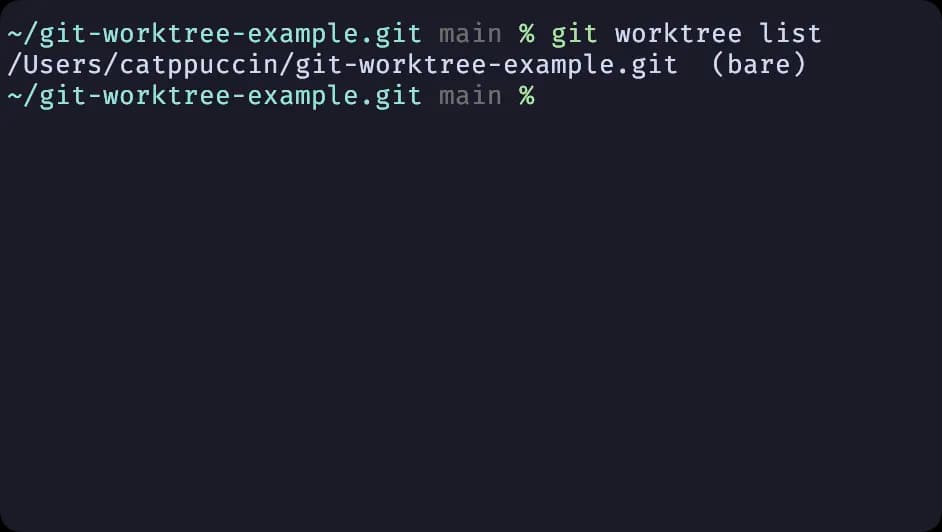
Using Bare Repository
Some developers use bare repositories with Git worktrees to keep a tidier folder structure.
git clone --bare <repository-url>
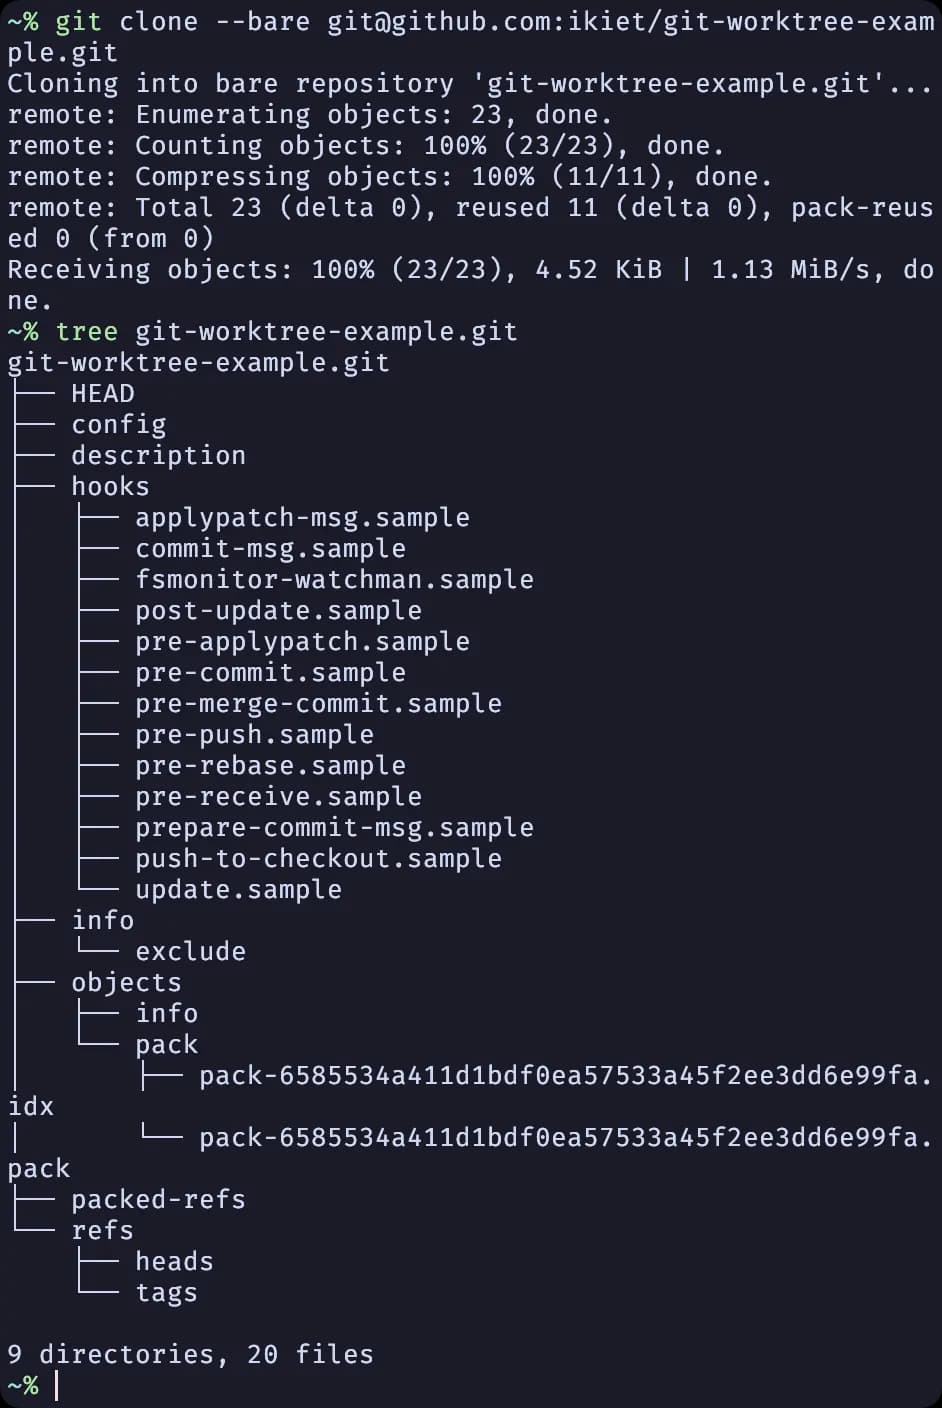
In this setup, the folder doesn't contain the .git directory. Instead, all of the contents of the .git folder will be directly visible in the cloned folder, and no worktree is created by default.
You’ll need to create a worktree to start working on the project. This method results in a cleaner folder structure, and the command to create a worktree is also simpler:
git worktree add main
git worktree add feature
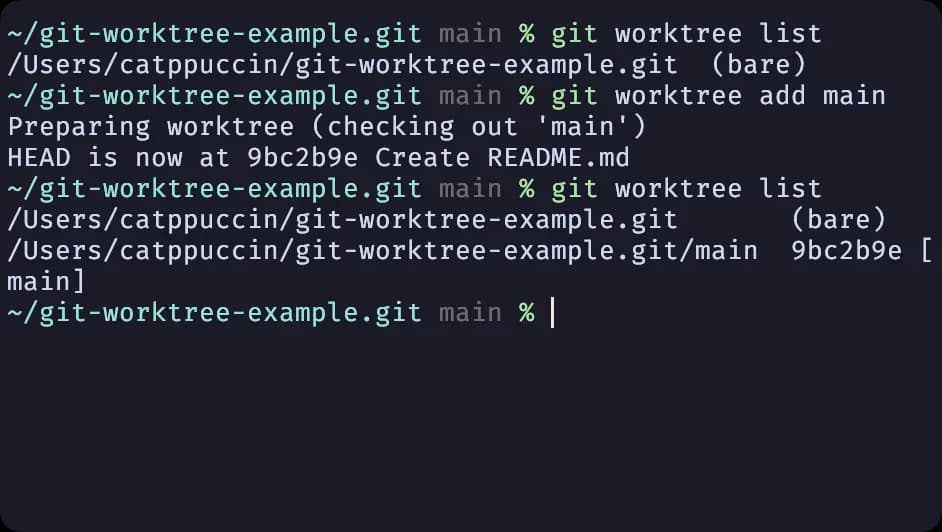
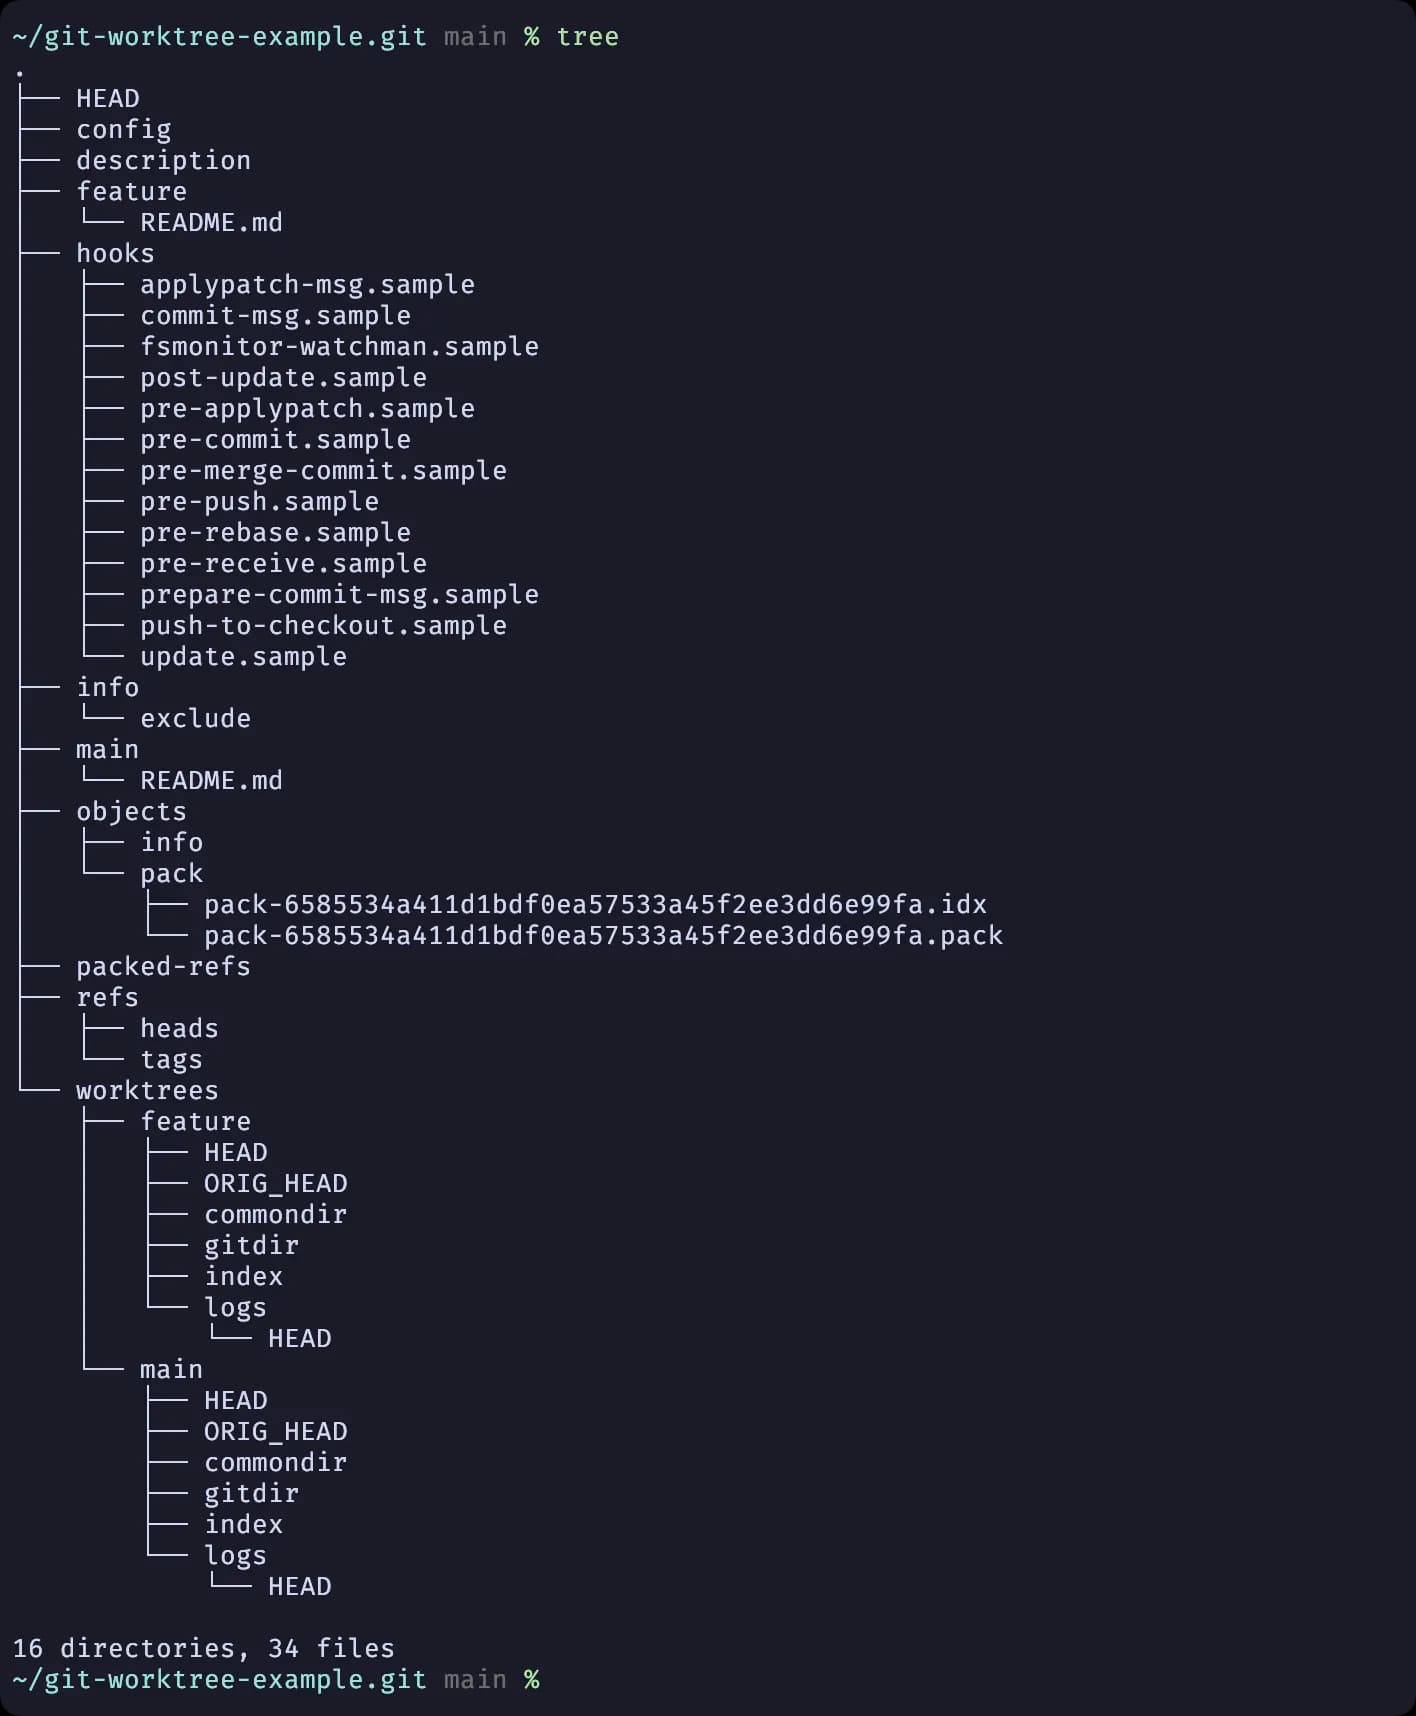
The folder structure will look like this:
However, using a bare repository in this way introduces a problem: you can’t fetch new remote branches as they are created. This is why I consider this approach a bit of a hack, and it can complicate things.
You can fix this issue by adding a fetch configuration in the config file, as shown below:
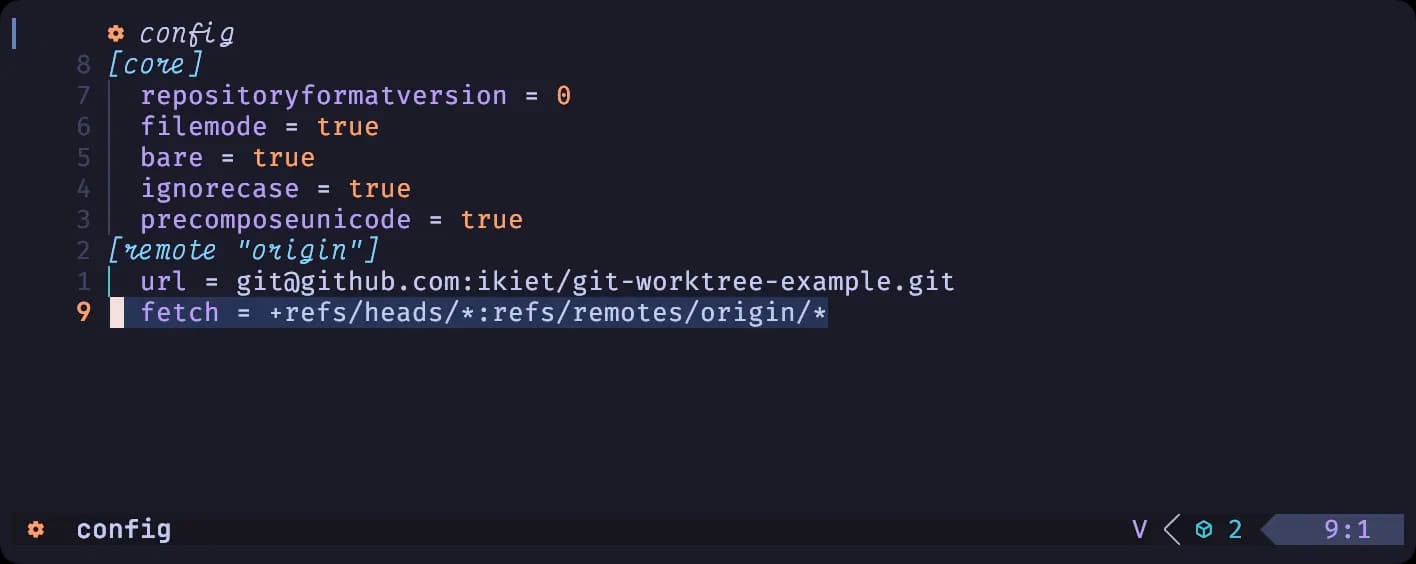
Although this workaround solves the fetching problem, I prefer the regular approach. As I’ve researched, bare repositories weren’t intended for this purpose. So, it’s better to keep things simple.